Table of Contents
Introduction: Why Your Laptop Webcam Not Working
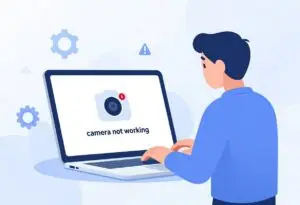
Video calls rule daily life now, with tools like Zoom and Teams keeping us connected. A sudden webcam failure disrupts that flow and sparks panic. This article gives you a full path to diagnose and solve the problem, covering basics to advanced steps. Issues like this pop up often on Windows laptops from Dell or HP and MacBooks too. You will learn quick wins that fix most cases without tech support.
Section 1: Initial Triage – Quick Checks Before Diving Deep
Start with basic steps that catch the issue right away. Many users skip these and jump to complex fixes. These checks take under five minutes and work on most laptops.
Check Physical Privacy Switches and Sliders
Some laptops have built-in covers for the camera lens. You might find a small slider next to the screen bezel that blocks the view. On models like the Dell XPS or Lenovo Yoga, slide it open to test. If your laptop lacks one, check for tape or stickers over the lens from past privacy worries. Clean the lens gently with a microfiber cloth if dust blocks it. This simple move restores the feed in seconds for many.
Verify Software Privacy Settings (Windows & macOS)
Your operating system controls camera access. For Windows, go to Settings. Choose Privacy & security, then Camera. Turn on Allow apps to access your camera. Check the list below it. Grant access to your app, like Microsoft Teams. On macOS, open System Settings. Go to Privacy & Security, then Camera. Turn on apps such as FaceTime or Skype. Restart the app next. These settings block the camera for privacy. Change them to permit access.
Test the Webcam with Multiple Applications
Open the built-in camera app first to see if the problem runs deep. On Windows, search for “Camera” in the Start menu and launch it. If it shows your face, the hardware works, and the issue ties to one app. Try Zoom or Google Meet next; if they fail, check app settings for camera selection. On Mac, use Photo Booth or FaceTime for the test. Switch between front and rear cameras if your laptop has both. This test pins down if the fault is global or just in one program. Run it with the laptop at full charge to rule out power glitches.
Section 2: Driver Deep Dive – Updating and Reinstalling Essentials
Drivers link your webcam to the OS. Outdated or corrupt ones cause most ongoing webcam not working problems. Focus here if quick checks fail.
How to Update the Webcam Driver via Device Manager
Press Windows key plus X and pick Device Manager. Expand the Imaging devices or Cameras section. Right-click your webcam, like “Integrated Webcam,” and choose Update driver. Select “Search automatically for drivers” and let it scan. Windows pulls the latest from its database. Restart your laptop after the update. If no imaging device shows, expand Universal Serial Bus devices and look there. This process refreshes the connection and fixes bugs in old software.
Rolling Back or Reinstalling Faulty Drivers
A bad update can make issues worse. Open Device Manager. Right-click the webcam. Pick Properties. Head to the Driver tab. Click Roll Back Driver if it shows up. It switches back to the old working version. For a fresh install, select Uninstall device. Check “Delete the driver software for this device.” Right-click empty space in Device Manager. Choose Scan for hardware changes. Your laptop pulls in a new driver. Pick times when nothing else runs. This cuts risk of data loss. Test the camera in the Camera app next.
Searching for Manufacturer-Specific Drivers
Windows Update skips certain fixes. Check your laptop brand’s website for extras. HP users should download Support Assistant and run a scan. Dell owners visit dell.com/support, type in your model, and download the camera driver from Drivers & Downloads. Lenovo provides Vantage for automatic updates. Select the version for your OS, such as Windows 11. Install it, restart your machine, and verify. These drivers fix problems standard updates miss and lift performance.
Section 3: System Conflicts and Hardware Diagnostics
Software clashes or hidden errors block the camera next. Run these checks to spot them. They build on driver fixes for stubborn cases.
Disabling Antivirus or Firewall Blocks
Antivirus software or firewalls can block webcams as risks. Open Norton or Windows Defender. Check the quarantine area. Restore camera files if they show up. Switch off real-time protection for a short time. In Defender, pick Virus & threat protection, then Manage settings. Turn it off for 10 minutes. Test the camera now. Search for Windows Firewall next. Let camera apps through it. Turn security back on when done. This fixes blocks without deleting the programs.
Checking Device Status in Device Manager (Error Codes)
Back in Device Manager, right-click the webcam and view Properties. Under General, note any error in Device status. Code 10 means the device failed to start, often a driver issue. Code 43 points to hardware disable or conflict. Code 28 shows missing drivers. Yellow exclamation marks signal trouble. Double-click for details and follow the error guide. Note the code and search Microsoft’s support site for exact steps. Clear these to get the camera online.
Utilizing Built-in Hardware Troubleshooters
Windows has tools to scan peripherals. Search for “Troubleshoot settings” in Start and open it. Select Other troubleshooters and run Hardware and Devices if listed, or Camera for direct checks. Follow on-screen prompts to detect issues. On macOS, hold Option and click the Apple menu for diagnostics; pick Hardware and test the camera module. These auto-tools fix common glitches like loose connections. Run them weekly for maintenance. If they flag a fault, note it for the next steps.
Section 4: Advanced Windows Registry and BIOS Checks
Tech-savvy users, try these last. They touch core settings but carry risks. Back up your system first.
Examining the Device Status in the BIOS/UEFI
Restart and tap F2, Del, or F10 at the logo to enter BIOS. Use arrow keys to find Integrated Peripherals or Advanced tab. Look for Camera or Webcam and ensure it’s Enabled. Save changes with F10 and exit. Models vary: Acer uses F2, Asus taps Delete. If disabled, this firmware block caused the issue. Update BIOS from the maker’s site if needed, but follow instructions closely. Test post-reboot.
Modifying the Registry to Enable Disabled Devices (Caution Required)
Make a restore point first. Search for “Create a restore point” and follow the steps. Press Windows + R, type regedit, hit Enter. Go to HKEY_LOCAL_MACHINE\SOFTWARE\Microsoft\Windows Media Foundation\Platform. Spot EnableFrameServerMode. Change its value to 1 if set to 0. Close Registry Editor. Restart your computer. The key manages media access, cameras included. Bad changes crash Windows. Experts only try this. Unsure? Head to support.
Conclusion: Restoring Your Visual Connection
You started with physical switches and privacy toggles, then hit drivers and system scans. Most laptop webcam not working issues stem from updates or permissions, fixed in Section 1 or 2. If advanced steps fail, the hardware might need repair—take it to a certified tech. Follow this order for best results. Your video calls will light up again soon. Check your setup now and stay connected.
Laptop Webcam Not Working Laptop Webcam Not Working Laptop Webcam Not Working Laptop Webcam Not Working Laptop Webcam Not Working Laptop Webcam Not Working Laptop Webcam Not Working Laptop Webcam Not Working Laptop Webcam Not Working Laptop Webcam Not Working Laptop Webcam Not Working
Laptop Webcam Not Working Laptop Webcam Not Working Laptop Webcam Not Working Laptop Webcam Not Working Laptop Webcam Not Working Laptop Webcam Not Working Laptop Webcam Not Working Laptop Webcam Not Working Laptop Webcam Not Working Laptop Webcam Not Working